Cedar siding maintenance and care are crucial for preserving the beauty and longevity of your home’s exterior. This guide delves into the essential aspects of maintaining your cedar siding, from routine cleaning and staining to addressing damage and implementing preventative measures. Understanding the unique properties of cedar and employing the correct techniques will ensure your siding remains a stunning and durable feature of your home for years to come.
We’ll cover various topics, including choosing the right cleaning solutions for different stains, applying stains and sealants effectively, repairing common damage, and creating a seasonal maintenance schedule. By following these guidelines, you can protect your investment and maintain the natural charm of your cedar siding.
Introduction to Cedar Siding
Cedar siding remains a popular exterior cladding choice for homeowners due to its inherent beauty and durability. Its natural aesthetic appeals to those seeking a classic, timeless look, while its inherent properties offer significant long-term benefits compared to other materials. The rich reddish-brown tones of Western Red Cedar, for example, are highly sought after, and the natural grain patterns add visual interest to any home.
The advantages of using cedar siding are numerous. Beyond its aesthetic appeal, cedar is naturally resistant to rot and insect damage, thanks to its high concentration of natural oils. This inherent resistance reduces maintenance needs and extends the lifespan of the siding considerably, making it a cost-effective choice in the long run. Furthermore, cedar is a relatively lightweight material, making it easier and less expensive to install than some heavier alternatives like stone or brick. Its excellent insulating properties also contribute to energy efficiency, reducing heating and cooling costs.
Types of Cedar Siding
Cedar siding comes in a variety of profiles to suit different architectural styles and personal preferences. The choice depends on factors such as the desired aesthetic, the budget, and the complexity of the installation. Each type offers unique visual characteristics and performance attributes.
- Bevel Siding: This is a popular choice known for its clean lines and relatively simple installation. Bevel siding features a tapered profile, creating a subtle shadow line that adds depth and texture to the wall. It’s often available in various widths, allowing for customization.
- Clapboard Siding: Clapboard, also known as lap siding, is characterized by its overlapping boards, creating a classic and traditional look. The overlapping design provides additional weather protection and enhances the home’s insulation. It is often seen on older homes and those aiming for a more historical feel.
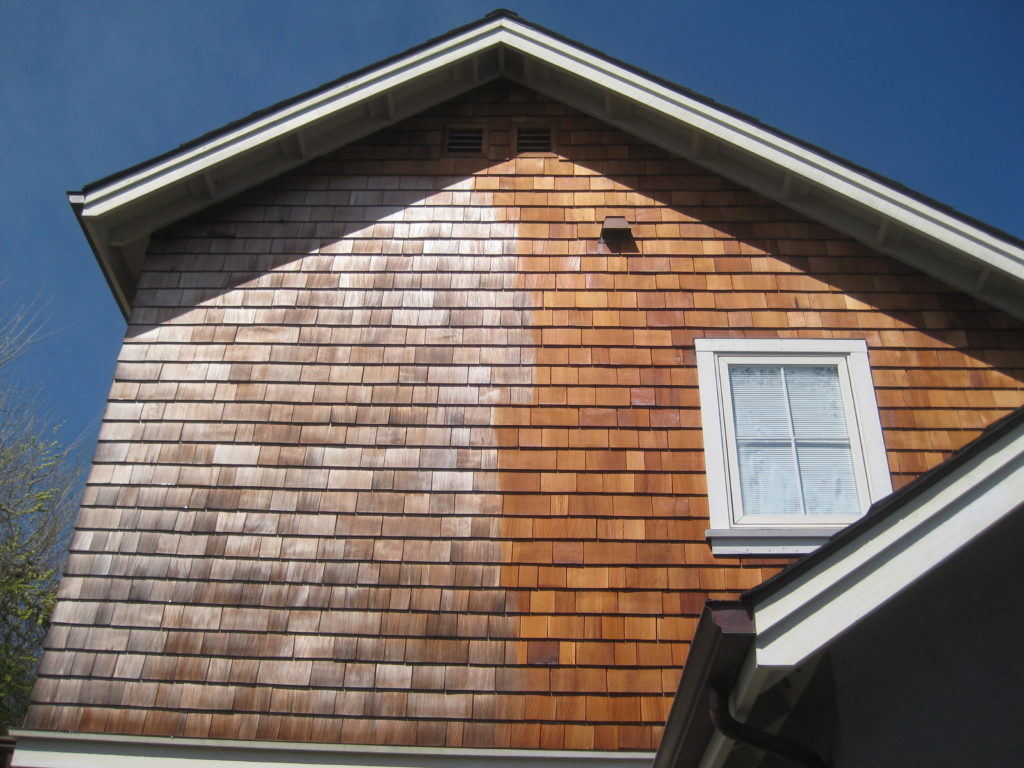
- Shingles: Cedar shingles offer a rustic and charming aesthetic. They are typically thicker than bevel or clapboard siding and are installed in overlapping rows. The variations in the size and shape of individual shingles create a unique and textured surface. Shingles are often used to achieve a more handcrafted, natural look.
Cleaning Cedar Siding
Regular cleaning is crucial for maintaining the beauty and longevity of your cedar siding. Dirt, mildew, and algae can not only detract from its appearance but also damage the wood over time. Proper cleaning techniques will help preserve your home’s exterior and protect your investment.
Pressure Washing Cedar Siding
Pressure washing can be an effective method for cleaning cedar siding, but it requires caution to avoid damaging the wood. Improper pressure washing can easily gouge or splinter the soft cedar. Always prioritize safety and use the correct techniques.
- Safety First: Always wear safety goggles, gloves, and closed-toe shoes. Protect nearby plants and landscaping with tarps or plastic sheeting. Never point the pressure washer at yourself or others.
- Choose the Right Nozzle: Select a nozzle with a wide fan pattern, rather than a narrow stream. A wide pattern provides a gentler cleaning action and reduces the risk of damage. The pressure should be set to the lowest effective setting.
- Test in an Inconspicuous Area: Before washing the entire surface, test the pressure and cleaning solution in a small, hidden area to ensure it doesn’t damage the wood or change its color.
- Apply Cleaning Solution: Apply a suitable cleaning solution (see table below) to the siding, allowing it to dwell for the recommended time. Use a garden sprayer or a low-pressure nozzle to apply the solution evenly.
- Rinse Thoroughly: Begin rinsing from the top of the siding and work your way down, ensuring complete removal of the cleaning solution and any loosened debris. Maintain a safe distance to prevent damage.
- Allow to Dry: Allow the siding to air dry completely before applying any protective treatments, such as a sealant or stain.
Cleaning Cedar Siding Without a Pressure Washer
For a gentler approach, or if you don’t own a pressure washer, several methods exist for cleaning cedar siding. These methods are less aggressive and ideal for delicate areas or when you want to avoid the potential risks associated with high-pressure water.
- Soft Brush and Cleaning Solution: Mix a mild cleaning solution (see table below) with water. Apply the solution using a soft-bristled brush, scrubbing gently to remove dirt and mildew. Rinse thoroughly with a garden hose.
- Sponge and Cleaning Solution: Similar to the brush method, use a soft sponge to gently scrub the siding with a diluted cleaning solution. Rinse with a garden hose. This method is particularly useful for detailed cleaning of intricate areas.
Cleaning Solutions for Cedar Siding
The choice of cleaning solution depends on the type of stain you’re trying to remove. Always test any cleaning solution in an inconspicuous area first.
| Cleaning Solution | Stain Type | Application |
|---|---|---|
| Mild detergent and water (e.g., a solution of dish soap and water) | Dirt, general grime | Apply with a soft brush or sponge, scrub gently, rinse thoroughly. |
| Oxygen bleach solution (following product instructions) | Mildew, algae | Apply with a garden sprayer, allow to dwell for the recommended time, scrub gently if necessary, rinse thoroughly. |
| Commercial cedar cleaner (following product instructions) | Stubborn stains, mildew, algae | Apply as directed on the product label. Always follow safety precautions. |
Staining and Sealing Cedar Siding
Protecting your cedar siding investment requires more than just cleaning; regular staining and sealing are crucial for preserving its beauty and extending its lifespan. These processes create a barrier against the elements, preventing moisture damage, rot, and insect infestation, ultimately saving you money on costly repairs down the line. Choosing the right products and applying them correctly is key to achieving optimal results.
Staining and sealing cedar siding offer several key benefits. Stains penetrate the wood, enhancing its natural color and grain while providing a degree of protection against UV damage and moisture. Sealants, on the other hand, form a protective film on the surface, further shielding the wood from the elements. The combination of stain and sealant offers the most comprehensive protection.
Stain Types and Sealant Options
Several types of stains and sealants are available, each with its own advantages and disadvantages. Oil-based stains penetrate deeply into the wood, offering superior protection against moisture but taking longer to dry and potentially emitting stronger fumes. Water-based stains are lower in VOCs (volatile organic compounds), dry faster, and are easier to clean up, though they may not penetrate as deeply as oil-based options and may require more frequent reapplication. Sealants can range from clear finishes that protect without altering the wood’s color to pigmented sealants that offer additional UV protection. Choosing the right combination depends on your desired aesthetic and the level of protection needed. For example, a high-traffic area might benefit from a durable oil-based stain and a clear sealant, while a less exposed area could be adequately protected with a water-based stain and a pigmented sealant.
Applying Stain and Sealant to Cedar Siding
Proper preparation is paramount for successful staining and sealing. Begin by thoroughly cleaning the siding to remove dirt, mildew, and loose debris. Allow the siding to dry completely before proceeding. Next, repair any damaged areas, such as cracks or holes, using wood filler. Sand the filled areas smooth and allow the filler to dry. Finally, lightly sand the entire surface of the siding to create a uniform texture for better stain and sealant adhesion.
The application process itself involves several steps. Always follow the manufacturer’s instructions for the specific products you’ve chosen. Generally, stain is applied first, using a brush, roller, or sprayer, working in the direction of the wood grain. Allow the stain to dry completely before applying the sealant. Sealant is applied in a similar manner, ensuring even coverage. Multiple thin coats are generally better than one thick coat, allowing each coat to dry properly before applying the next.
Necessary Tools and Materials
Proper preparation is essential for a professional finish. Here’s a list of necessary tools and materials:
- Cleaning solution (e.g., trisodium phosphate)
- Stiff-bristled brush
- Pressure washer (optional, but recommended for thorough cleaning)
- Wood filler
- Putty knife
- Sandpaper (various grits)
- Safety glasses
- Gloves
- Drop cloths
- Paint brushes or rollers (depending on the size of the project)
- Sprayer (optional)
- Cedar stain (oil-based or water-based)
- Cedar sealant (clear or pigmented)
Repairing Damaged Cedar Siding
Cedar siding, while durable, is susceptible to damage over time. Understanding the common causes of damage and employing appropriate repair techniques is crucial for maintaining the beauty and longevity of your home’s exterior. Ignoring minor damage can lead to more extensive and costly repairs later.
Types of Cedar Siding Damage
Cedar siding can suffer from a variety of issues, each requiring a different approach to repair. Common problems include cracking, rot, and insect infestation. Cracks often appear due to weathering, shrinkage, or impact damage. Rot, typically caused by prolonged moisture exposure, manifests as soft, spongy wood that may be discolored. Insect infestations, such as carpenter ants or termites, can create significant structural damage, often hidden beneath the surface. Identifying the type of damage is the first step in effective repair.
Repairing Minor Damage to Cedar Siding
Minor damage, such as small cracks or superficial scratches, can often be repaired with wood filler. Choose a high-quality exterior-grade wood filler that is compatible with cedar. Clean the damaged area thoroughly, removing any loose wood or debris. Apply the filler according to the manufacturer’s instructions, ensuring a smooth, even surface. Once dry, sand the filled area smooth and apply a fresh coat of stain or sealant to match the existing finish. For small holes, wood dowels can be used to fill the void before applying filler. This provides added strength and stability.
Replacing Damaged Cedar Siding Boards
More extensive damage, such as significant rot or insect infestation, often necessitates replacing the affected siding boards. This process involves several steps.
Measuring and Cutting Replacement Boards
Precise measurements are essential for a seamless replacement. Carefully measure the length and width of the damaged board, adding a small amount for trimming. Use a sharp saw, such as a hand saw or circular saw, to cut the new board to the correct size. Ensure the cut is clean and straight to maintain a professional appearance. Consider pre-drilling pilot holes to prevent splitting when driving in nails or screws.
Installing New Cedar Siding Boards
Begin by removing the damaged board carefully, taking care not to damage surrounding boards. If nails are difficult to remove, use a nail puller or pry bar. Position the new board in place, aligning it with the surrounding boards. Secure the new board using galvanized nails or exterior-grade screws, spacing them evenly along the length of the board. Avoid overdriving fasteners, which can split the wood. Finally, apply a fresh coat of stain or sealant to blend the new board with the existing siding. This will protect the new wood from the elements and maintain a consistent appearance.
Preventing Damage to Cedar Siding
Proactive maintenance is key to extending the lifespan of your cedar siding and preserving its natural beauty. By implementing preventative measures, you can significantly reduce the risk of costly repairs and maintain the aesthetic appeal of your home’s exterior for years to come. This involves a multi-pronged approach focusing on moisture control, pest prevention, and overall siding health.
Protecting your cedar siding begins with understanding its vulnerabilities. Cedar, while naturally durable, is susceptible to damage from excessive moisture and insect infestations. These factors can lead to rot, warping, and structural compromise, diminishing the siding’s lifespan and impacting your home’s curb appeal. The following strategies address these key areas.
Moisture Damage Prevention
Proper ventilation is crucial to preventing moisture buildup. Adequate airflow around the siding helps to dry out any moisture that may accumulate, preventing rot and mildew. This can be achieved through proper soffit and fascia ventilation, ensuring there’s sufficient space between the siding and the house’s sheathing, and avoiding the use of materials that obstruct airflow. Regular inspections of the siding, particularly after periods of heavy rain or snow, can help identify any areas of excessive moisture retention early on. Prompt attention to these areas can prevent minor issues from escalating into major problems. For example, noticing a persistently damp area allows for timely repairs or adjustments to ventilation, preventing further damage.
Insect Infestation Prevention
Cedar siding can be attractive to various insects, including termites and carpenter ants. Regular inspections for signs of infestation, such as mud tubes (termites) or sawdust piles (carpenter ants), are vital. Professional pest control treatments may be necessary in cases of active infestation. However, preventative measures can significantly reduce the risk. This includes maintaining a clean perimeter around the house, removing any wood debris or piles of leaves that could attract insects, and ensuring proper ventilation to deter moisture-loving pests. Regularly applying a high-quality insecticide designed for exterior wood can also help create a protective barrier against insect attack. It’s important to choose a product specifically formulated for cedar siding and follow the manufacturer’s instructions carefully.
Maintaining Overall Siding Health
Consistent cleaning is essential to remove dirt, debris, and mildew that can accumulate over time. Regular cleaning not only improves the appearance of the siding but also helps prevent moisture damage and pest infestations. A gentle cleaning solution, such as a mixture of mild detergent and water, is typically sufficient. High-pressure washing should be avoided as it can damage the delicate wood fibers. Additionally, periodic inspections for any signs of damage, such as cracks, splits, or loose boards, are crucial for addressing minor issues before they become major problems. Prompt repairs can prevent water penetration and further damage to the siding. Regularly inspecting and maintaining the caulking around windows and doors will also help to prevent moisture intrusion. Finally, applying a high-quality wood sealant every few years helps to protect the cedar from the elements and prolong its lifespan. This protects the wood from UV damage, prevents moisture absorption, and enhances the siding’s natural beauty.
Cedar Siding and Seasonal Maintenance
Proper seasonal maintenance is crucial for preserving the beauty and longevity of your cedar siding. Regular inspections and targeted cleaning and treatments will protect your investment and prevent costly repairs down the line. Neglecting seasonal maintenance can lead to premature deterioration due to exposure to various weather elements.
Seasonal Maintenance Schedule for Cedar Siding
A proactive approach to cedar siding care involves a schedule tailored to the changing seasons. This ensures that your siding receives the necessary attention at the optimal time. The following table outlines a recommended maintenance plan:
| Season | Task | Frequency | Description |
|---|---|---|---|
| Spring | Clean Siding | Annually | Remove accumulated dirt, pollen, and debris using a soft bristle brush and a gentle cleaning solution. Rinse thoroughly with water. |
| Spring | Inspect for Damage | Annually | Check for cracks, loose boards, insect infestation, or signs of rot. Address any issues promptly. |
| Summer | Monitor for Moisture | Monthly | Regularly check for signs of excessive moisture retention, particularly after periods of rain. Proper ventilation is key to preventing moisture buildup. |
| Summer | Clean Gutters and Downspouts | Annually (or as needed) | Ensure proper water drainage away from the house to prevent water damage to the siding. |
| Fall | Leaf Removal | As needed | Remove leaves and debris that accumulate on the siding and around the foundation to prevent moisture retention and pest infestations. |
| Fall | Inspect Caulk and Sealants | Annually | Check for cracks or deterioration in caulking around windows and doors. Reapply as needed to prevent water intrusion. |
| Winter | Snow and Ice Removal | As needed | Remove heavy snow and ice accumulations from the roof to prevent damage to the siding from ice dams. |
| Winter | Monitor for Ice Dams | Regularly during snowstorms | Ice dams can cause significant damage to siding. Take preventative measures such as proper roof ventilation. |
Impact of Extreme Weather Conditions on Cedar Siding
Extreme weather events, such as prolonged periods of intense heat, heavy rainfall, freezing temperatures, and strong winds, can significantly impact cedar siding. Prolonged exposure to intense sunlight can cause the wood to dry out, crack, and fade. Excessive moisture can lead to rot and fungal growth. Freezing temperatures can cause expansion and contraction of the wood, potentially leading to cracking. Strong winds can dislodge siding, particularly if it is improperly installed or maintained. For example, a hurricane can cause significant damage to poorly maintained cedar siding, requiring extensive repairs or even complete replacement.
Preparing Cedar Siding for Harsh Weather Conditions
Preparing cedar siding for harsh weather involves preventative measures to minimize damage. Regular cleaning and sealing helps protect the wood from moisture damage. Proper caulking around windows and doors prevents water intrusion. Addressing any existing damage, such as cracks or loose boards, before harsh weather arrives is crucial. In areas prone to heavy snow, ensuring proper roof ventilation helps prevent ice dams. For example, homeowners in northern climates often install ice and water shields under their roofing shingles to prevent water from seeping behind the siding during periods of snow melt. Regular inspections and proactive maintenance are key to protecting your cedar siding from the damaging effects of extreme weather.
Illustrative Examples of Cedar Siding Maintenance
Proper maintenance is key to preserving the beauty and longevity of your cedar siding. Understanding how to address common issues will significantly extend its lifespan and maintain its aesthetic appeal. The following examples illustrate practical solutions for typical maintenance scenarios.
Cleaning Mildew from Cedar Siding
Mildew, a common problem in humid climates, presents as a dark, often fuzzy growth on the siding. Ignoring it can lead to wood rot and damage. Effective removal requires a systematic approach.
- Preparation: Protect surrounding landscaping and windows with drop cloths or plastic sheeting. Wear protective gear, including gloves and eye protection.
- Mixing the Solution: Prepare a cleaning solution by mixing one part bleach with three parts water in a bucket. Never mix bleach with ammonia or other cleaning agents.
- Application: Using a garden sprayer or a scrub brush, apply the solution to the affected areas. Work in small sections, allowing the solution to dwell for approximately 10-15 minutes before scrubbing.
- Scrubbing: Use a stiff-bristled brush to gently scrub the mildew away. Avoid excessive scrubbing, which could damage the wood. Rinse thoroughly with clean water using a garden hose.
- Drying: Allow the siding to air dry completely before applying any sealant or stain.
Repairing a Crack in Cedar Siding
Small cracks can be easily repaired to prevent further damage and maintain the siding’s integrity. Larger cracks may require board replacement.
- Assessment: Determine the depth and extent of the crack. Small, superficial cracks can be repaired with wood filler; larger cracks may require more extensive repair or board replacement.
- Cleaning: Clean the area around the crack thoroughly to remove any dirt, debris, or loose wood fibers.
- Filling: Apply a high-quality exterior wood filler, matching the color of the siding as closely as possible. Use a putty knife to smooth the filler into the crack, ensuring it’s level with the surrounding surface.
- Drying: Allow the filler to dry completely according to the manufacturer’s instructions. This usually takes several hours.
- Sanding: Once dry, gently sand the filled area smooth using fine-grit sandpaper. Wipe away any dust.
- Finishing: Apply a touch-up stain or paint to match the existing siding, ensuring a seamless finish.
Replacing a Damaged Cedar Siding Board
Severe damage, such as rot or significant warping, necessitates board replacement. This process requires some carpentry skills.
- Removal: Carefully remove the damaged board using a pry bar or similar tool. Be cautious not to damage adjacent boards.
- Measurement: Measure the length and width of the removed board to ensure accurate replacement.
- New Board Installation: Install the new board, ensuring it is properly aligned with the surrounding boards. Use exterior-grade nails or screws appropriate for cedar siding.
- Securing: Secure the new board in place using appropriate fasteners. Countersink the fasteners and cover with wood filler to create a smooth surface.
- Finishing: Once the filler is dry and sanded smooth, apply a stain or paint to match the surrounding siding for a consistent appearance.
Healthy vs. Damaged Cedar Siding
Healthy cedar siding exhibits a consistent, even color, typically ranging from light brown to reddish-brown depending on the species and age. The texture is smooth, with the natural grain clearly visible. The boards are firmly attached, showing no signs of warping, rot, or insect infestation. In contrast, damaged cedar siding may show discoloration (grayish, black, or patchy), signs of rot (soft, spongy areas), cracks or splits, insect holes, or warping. The texture might be rough, uneven, or feel loose to the touch. The overall appearance will be less uniform and aesthetically pleasing, indicating a need for maintenance or repair.
Closing Notes
Proper cedar siding maintenance and care is not merely about aesthetics; it’s about protecting a significant investment and extending the life of your home’s exterior. By diligently following the cleaning, staining, repair, and preventative measures outlined in this guide, you can ensure your cedar siding remains a beautiful and durable asset for many years. Regular inspections and proactive maintenance will save you time, money, and potential headaches in the long run, allowing you to enjoy the natural beauty of your cedar siding for years to come.